📄Basic Setup
*IMPORTANT If you are integrating a new version to an old one, click on the "Integrations with previous version" section.
(Make sure to compile and save frequently)
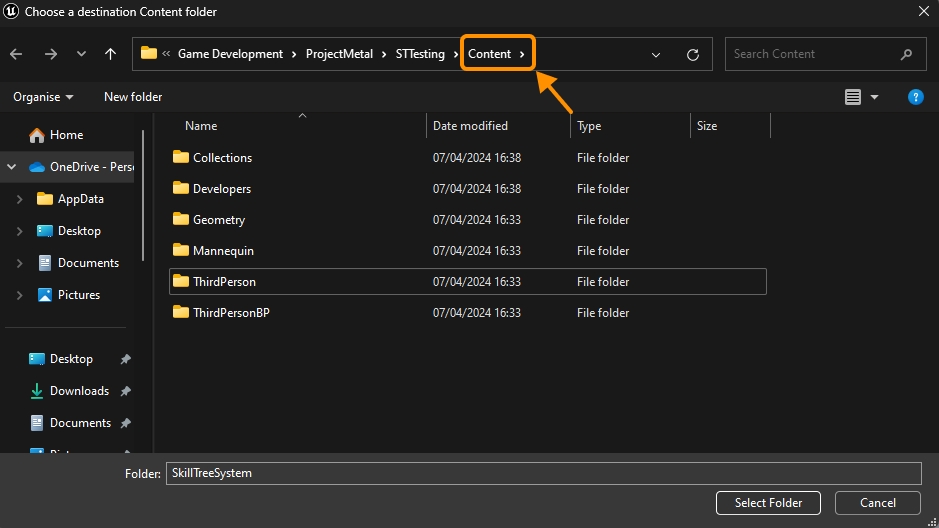
Create and migrate to your project. After creating the project, right click on the "SkillTreeSystem" folder -> Migrate -> Choose the content folder of the project you wish to integrate it to.
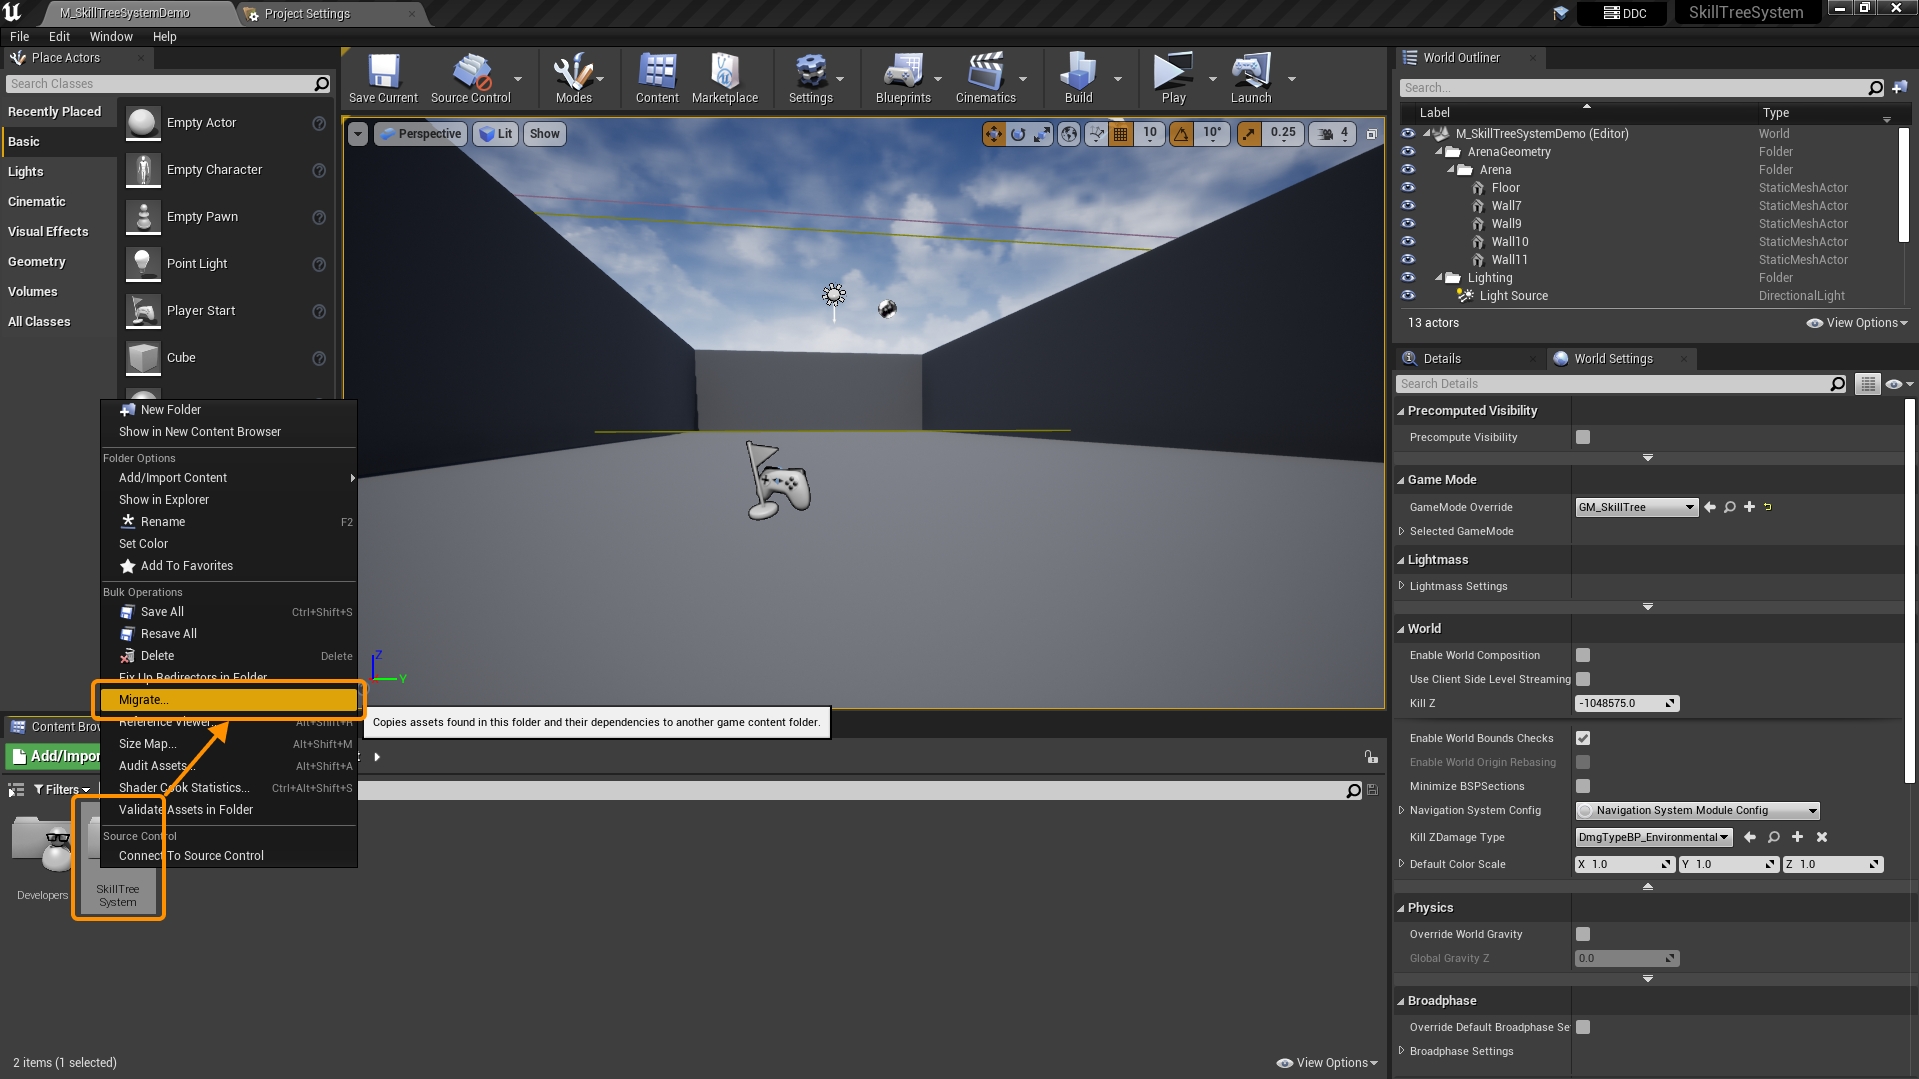
You can close the created Skill Tree System project after migrating to your project.
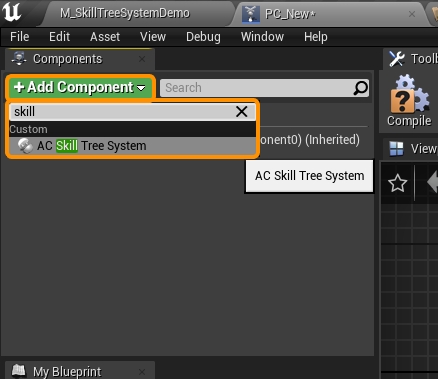
Open your player controller and add the "AC_SkillTreeSystem" component.
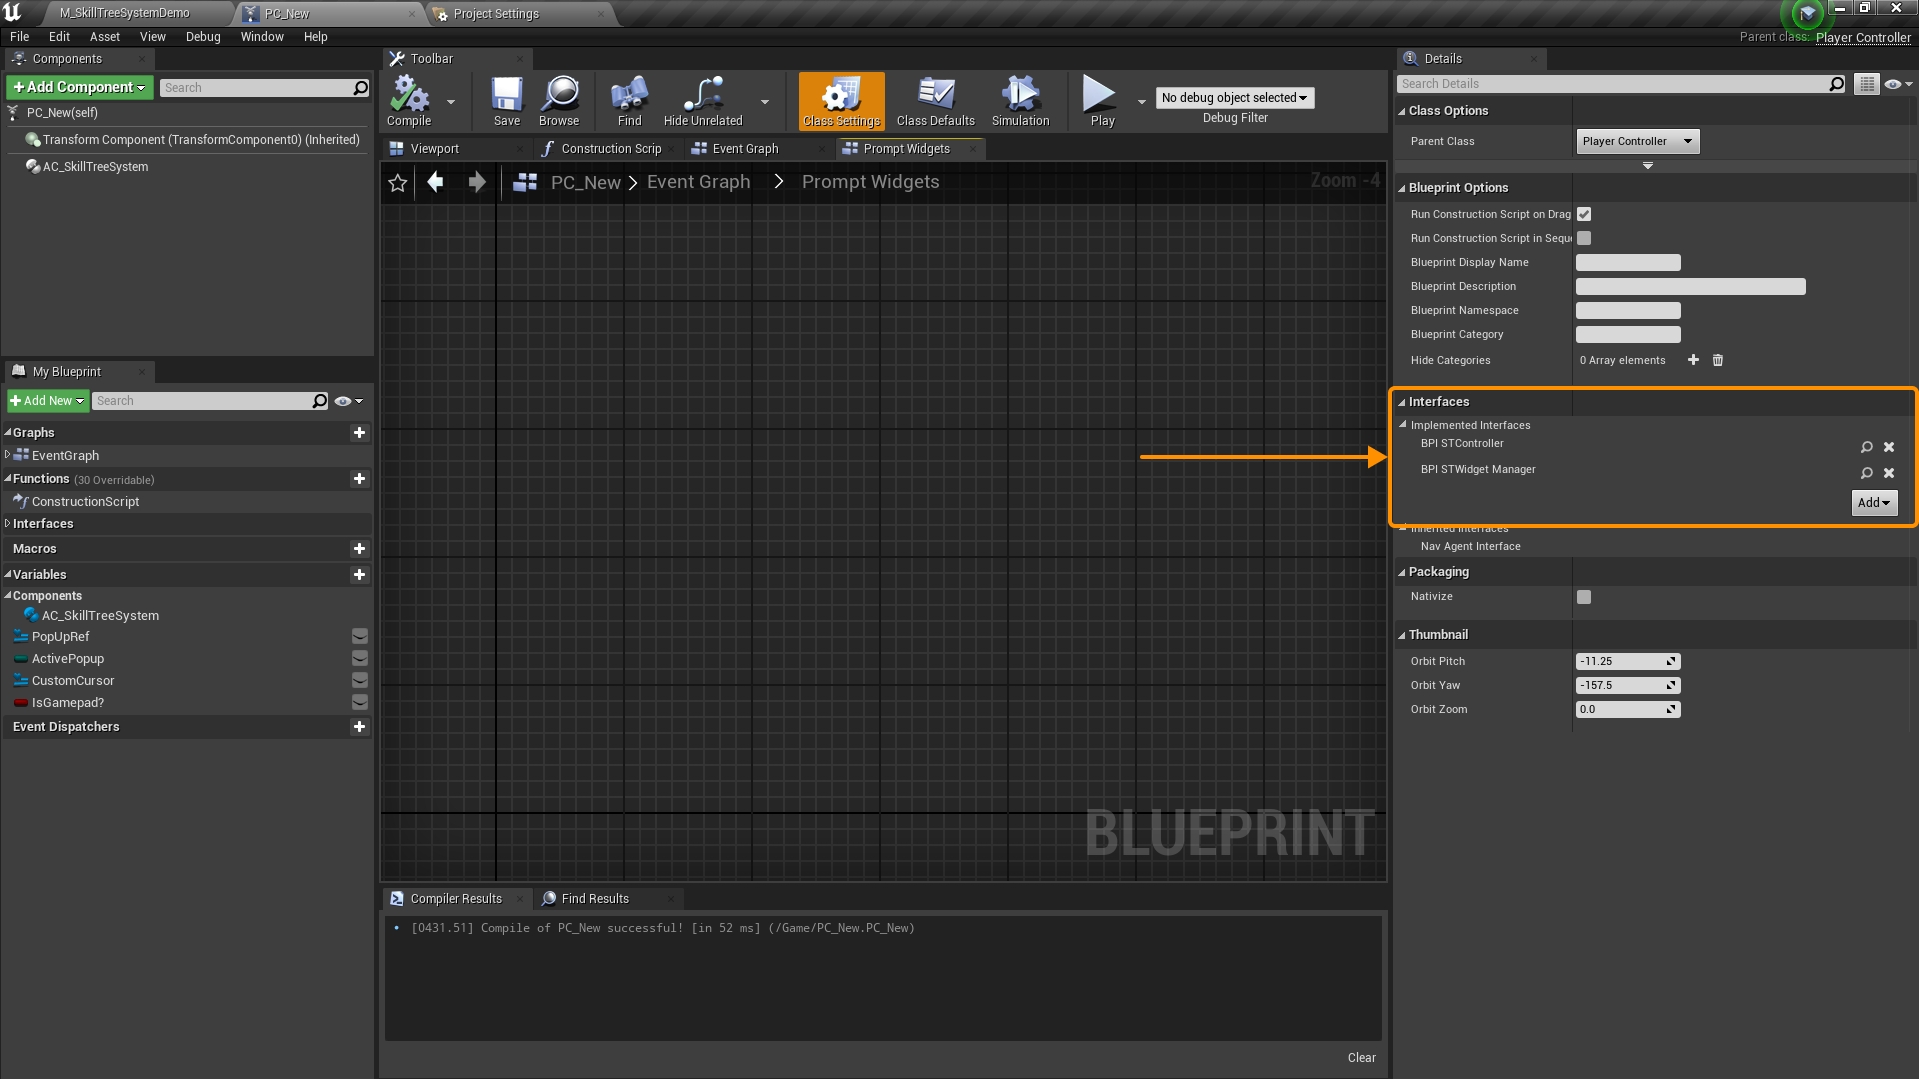
After adding the Actor Component to your player controller, go to the class settings section and add these 2 interfaces: - BPI_STController - BPI_STWidgetManager
After adding these interfaces, copy over the 2 graphs from the "PC_SkillTreeCharacter" (Path: SkillTreeSystem/Blueprints/PC_SkillTreeCharacter) to your player controller.
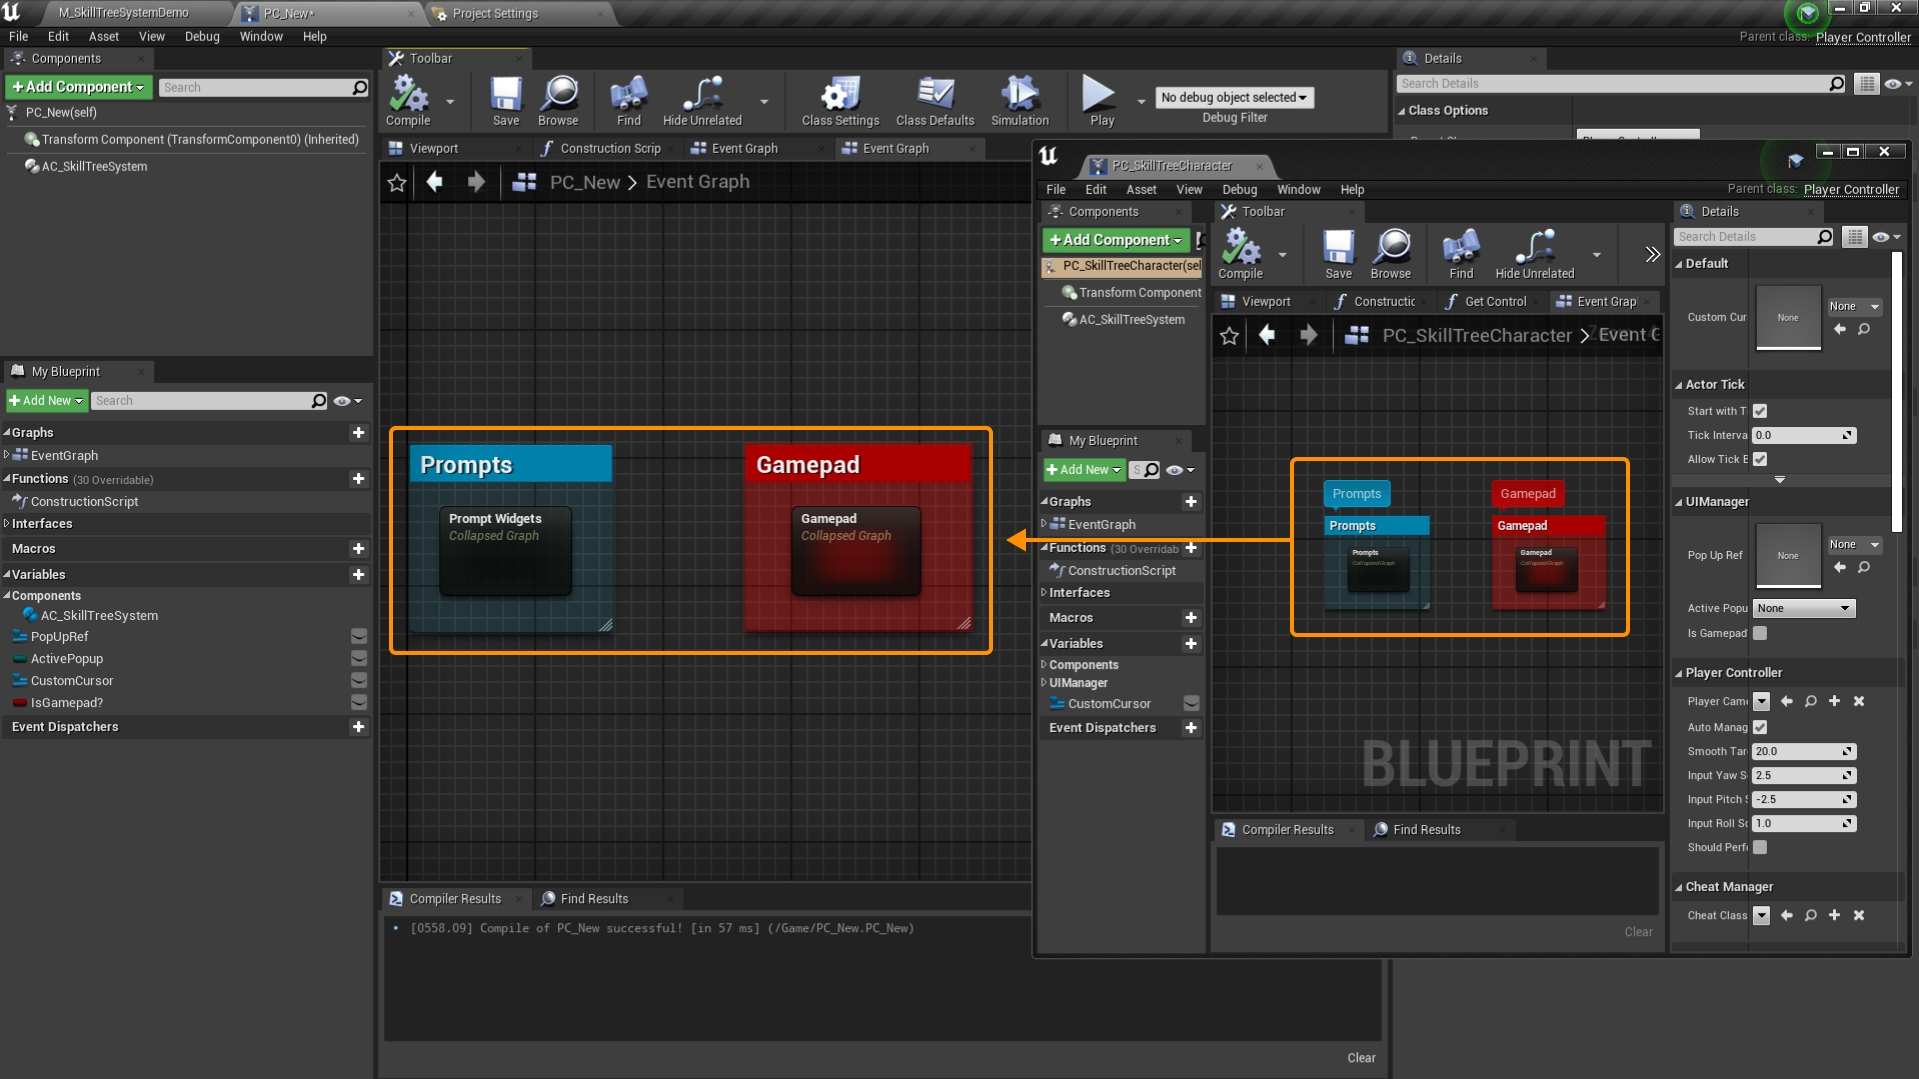
Copy over the variables as well:

If you plan on using the built in Create and Toggle Template UI functions, copy over these functions and variables as well:

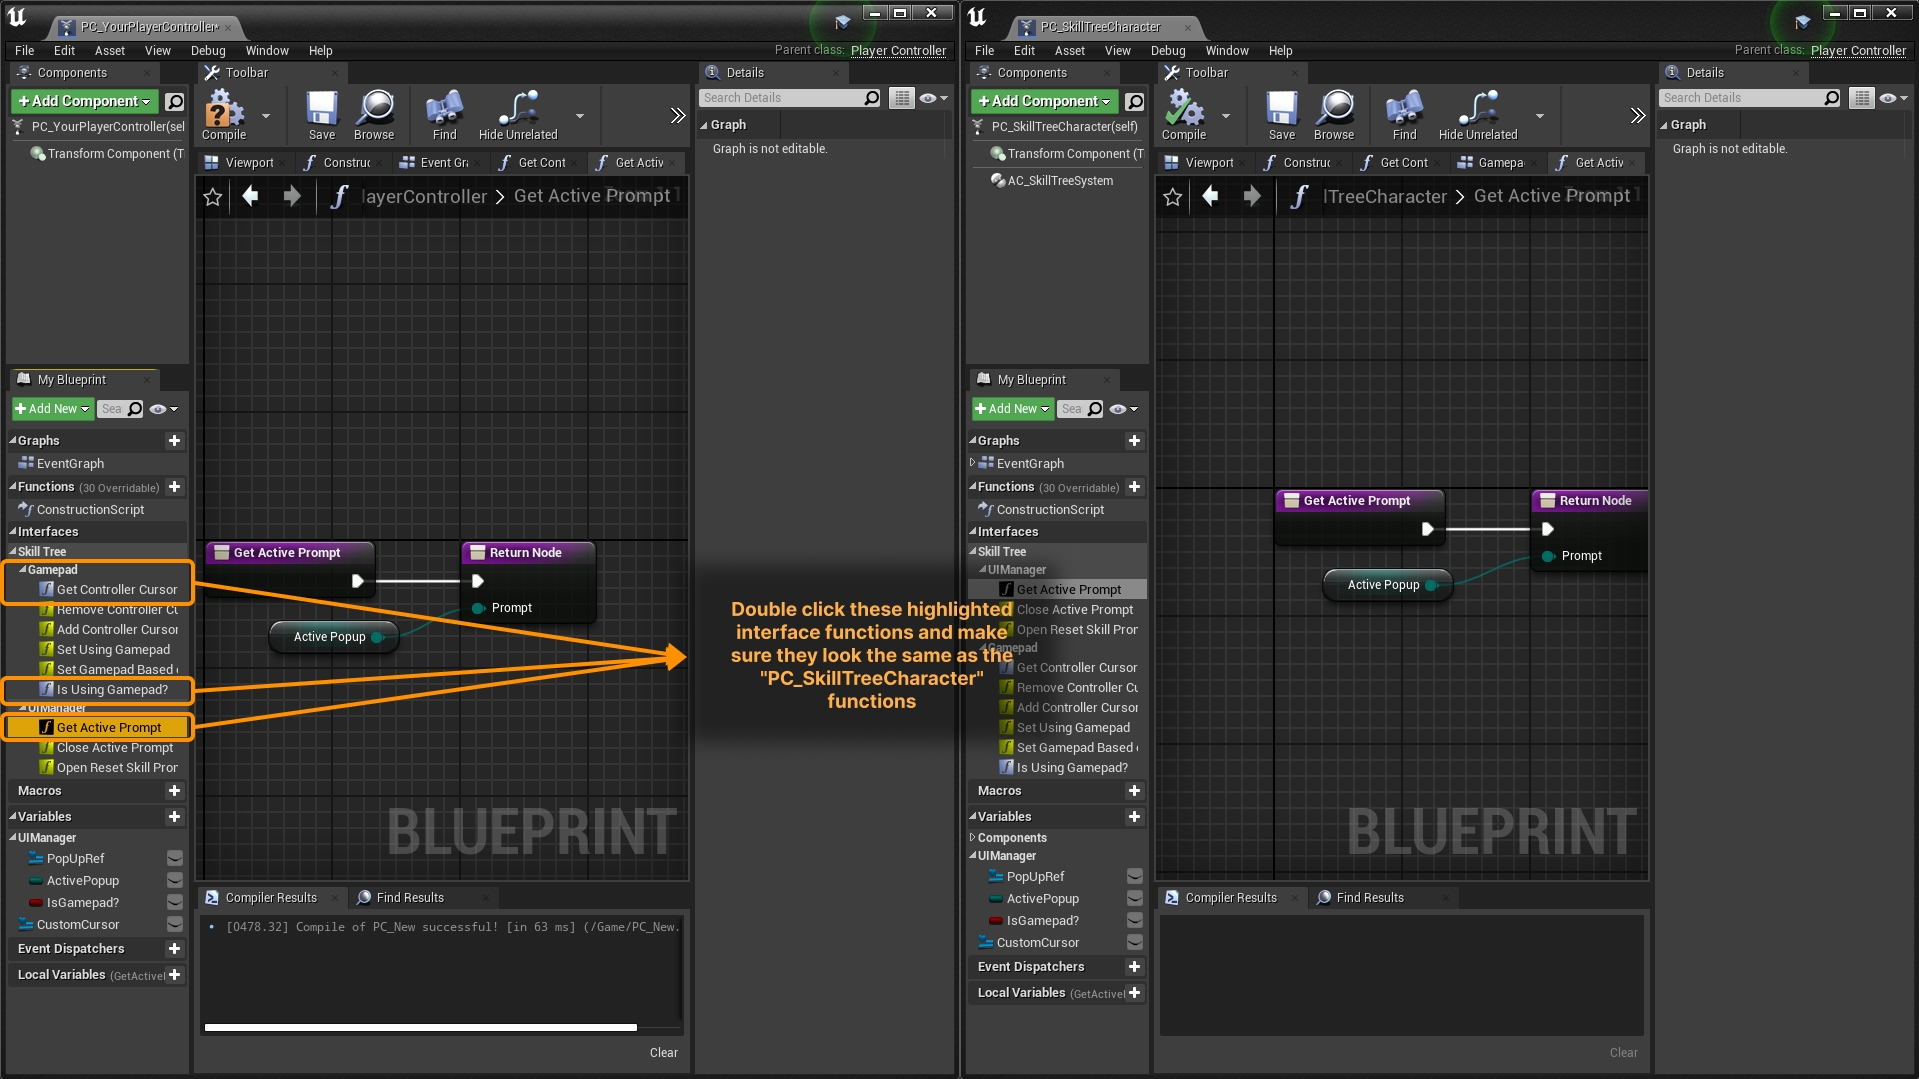
After copying over the variables, click on the highlighted interface functions and make sure they match the functions from the "PC_SkillTreeSystem".
Test to see if everything is correct so far.
Open your character blueprint and add a keyboard input.
Get the controller (If you have put the ToggleTemplateSkillTreeUI in the Player Controller)
In my case, Im casting to my player controller as an example, dragging off of it and calling the Toggle Template Skill Tree UI function
Play your game, press the input you have set, and see if the template skill tree pops up. If it does, then you have done everything correct so far. If it does not pop up, please ensure that the steps were done correctly and try again.


Adding Controller Support
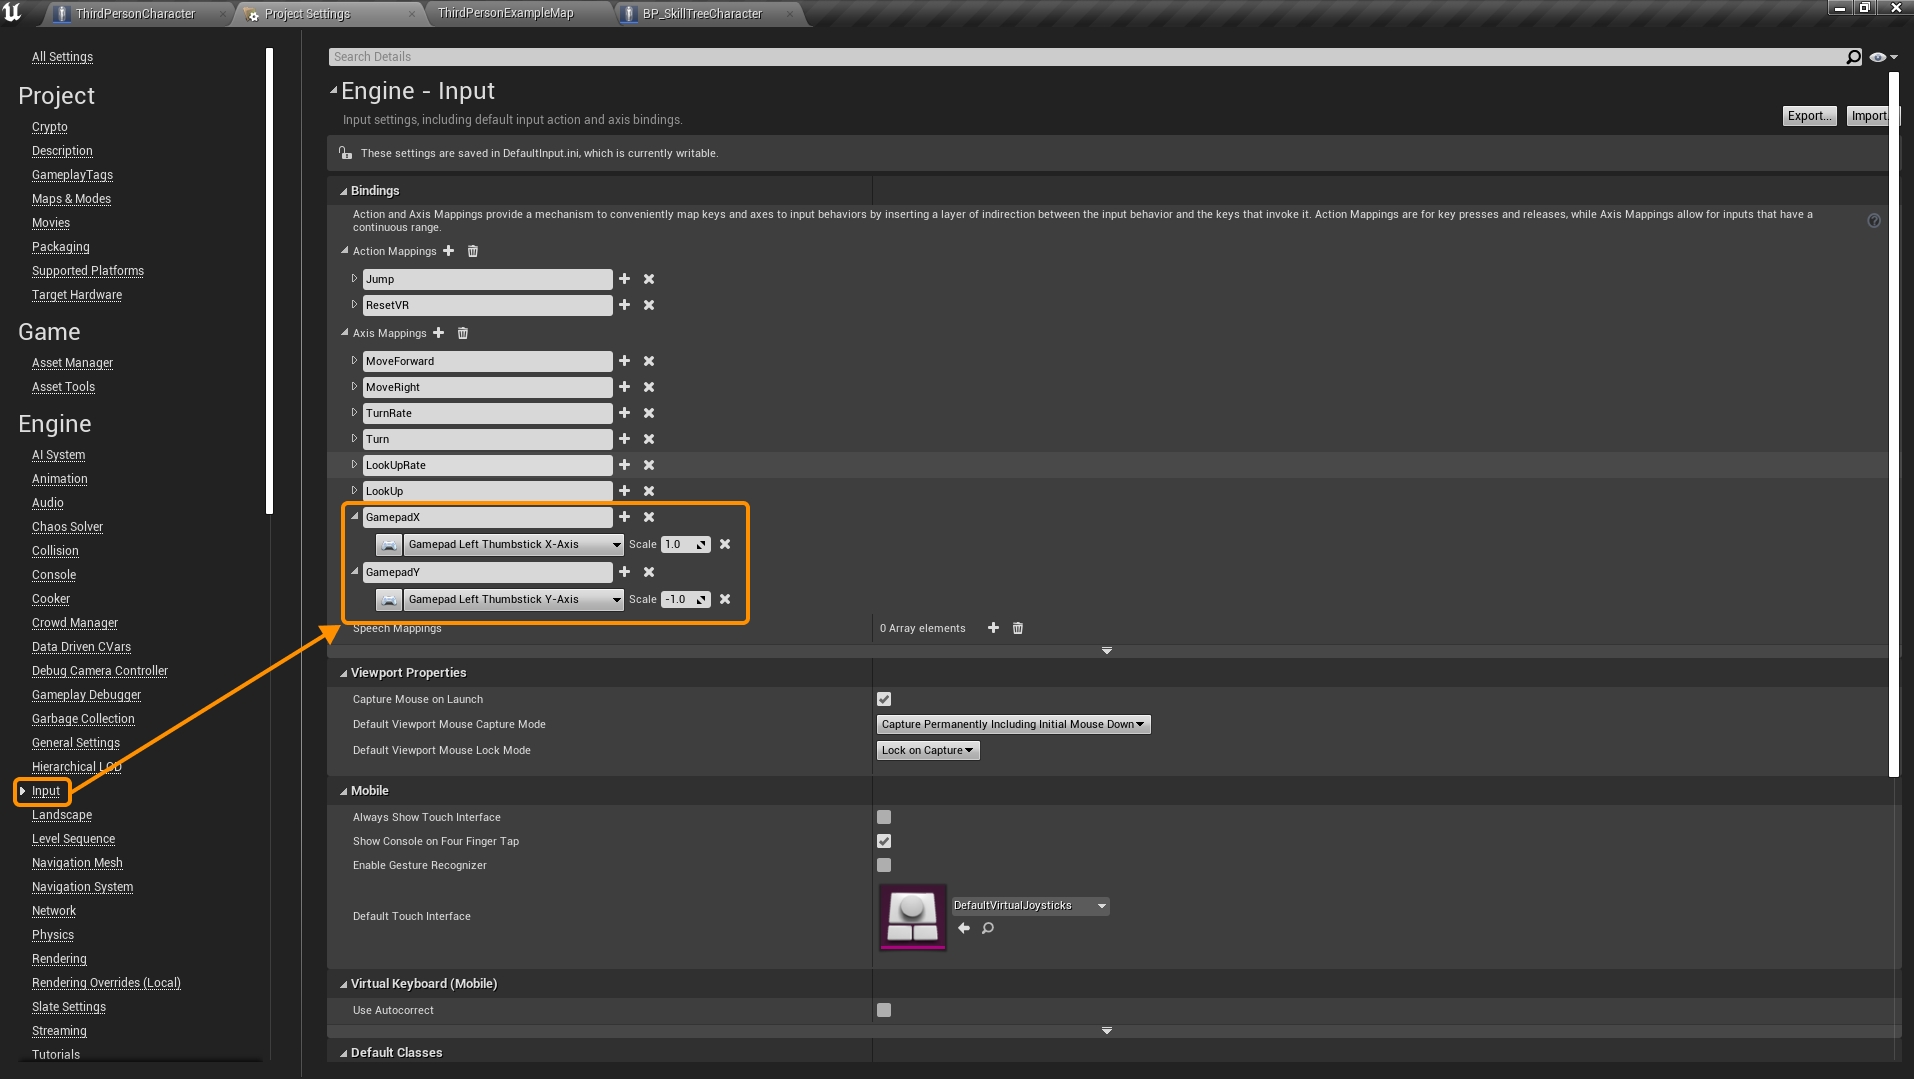
*Note: If the current controller support does not fit the style of your game, please feel free to send me an email or connect with me on discord to give me recommendations on how you would want it and I will try to add it into the next update. Email: thecrypticeclipsestudios@gmail.com Discord: https://discord.gg/JdVpxz8hDJ --------------------------------------------- Go to Project Settings -> Input -> Add 2 Axis Mappings You can name them GamepadX and GamepadY and bind them to the left thumbstick axis. *If you name them something else, just make sure to update the input event in the player blueprint to the corresponding input event.
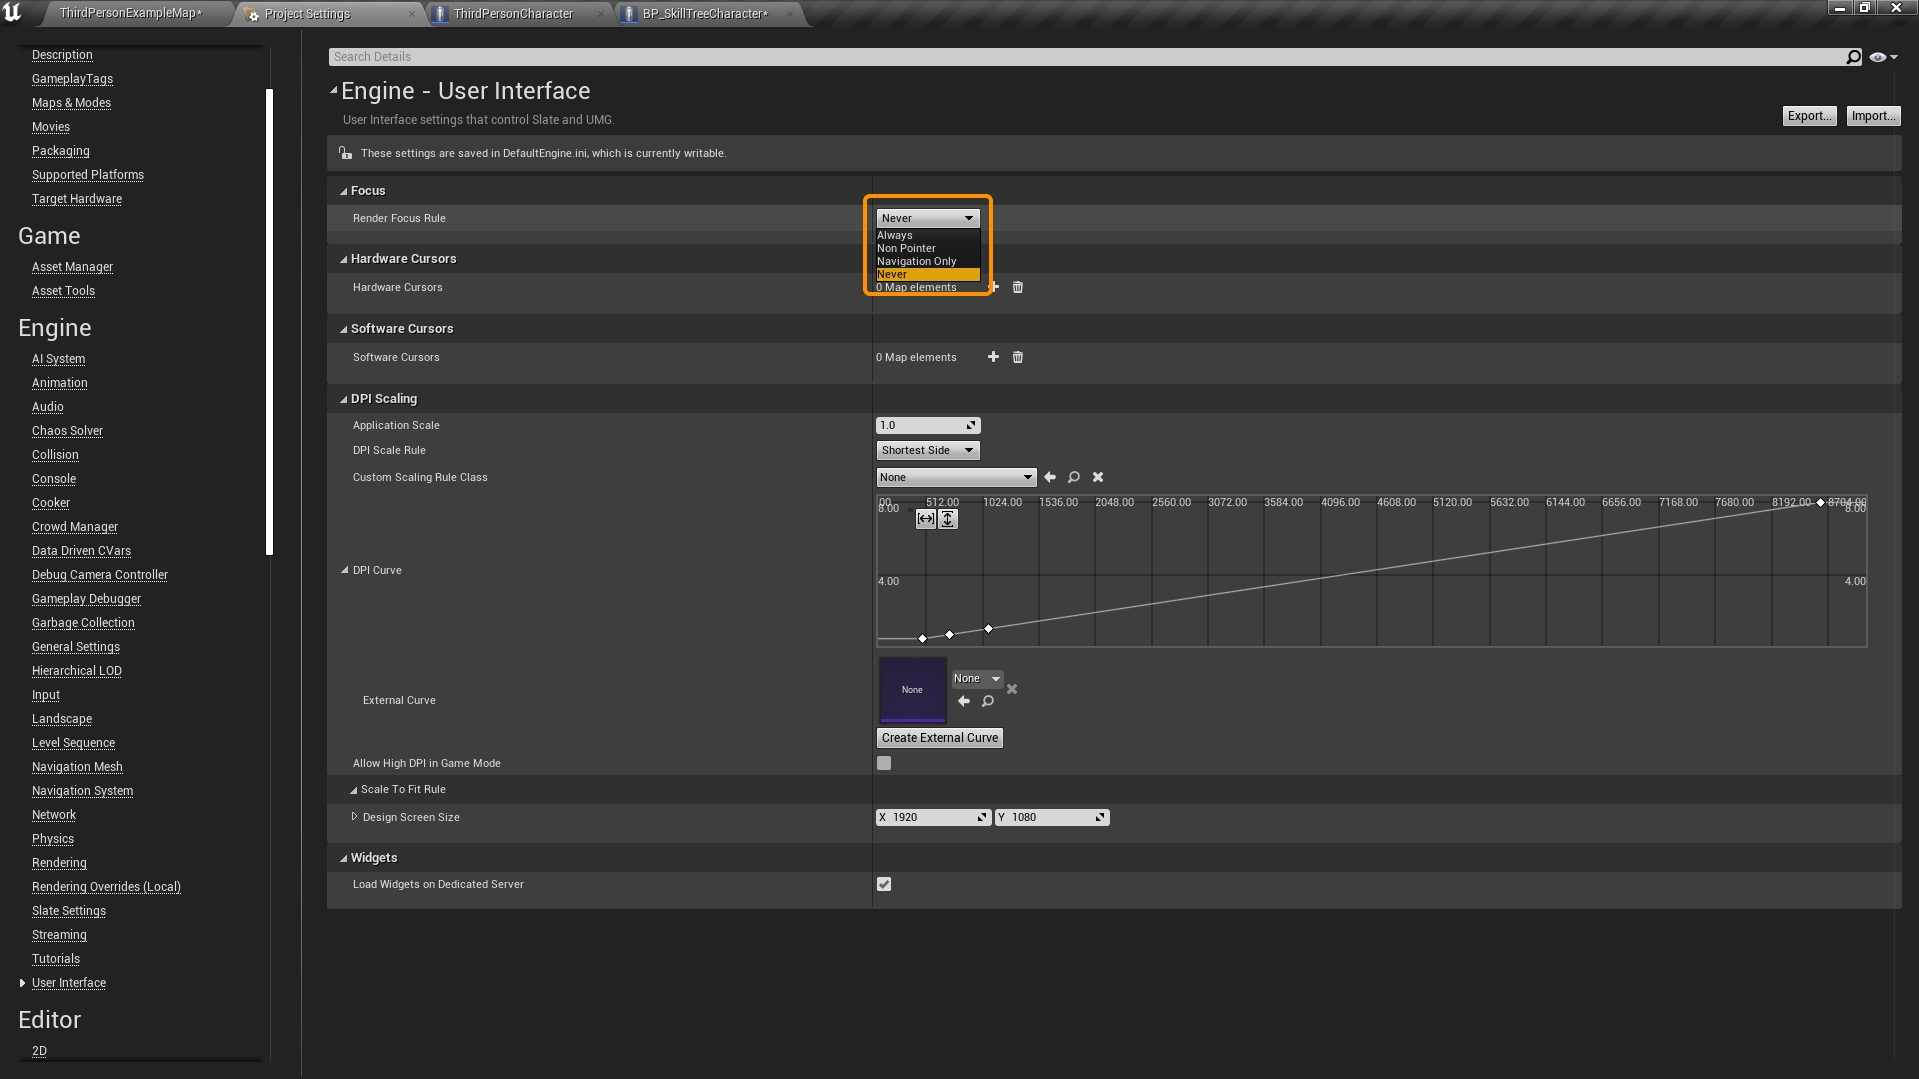
I recommend setting the navigation rule to "none" if you dont want to see the dashed outline borders when using the controller.
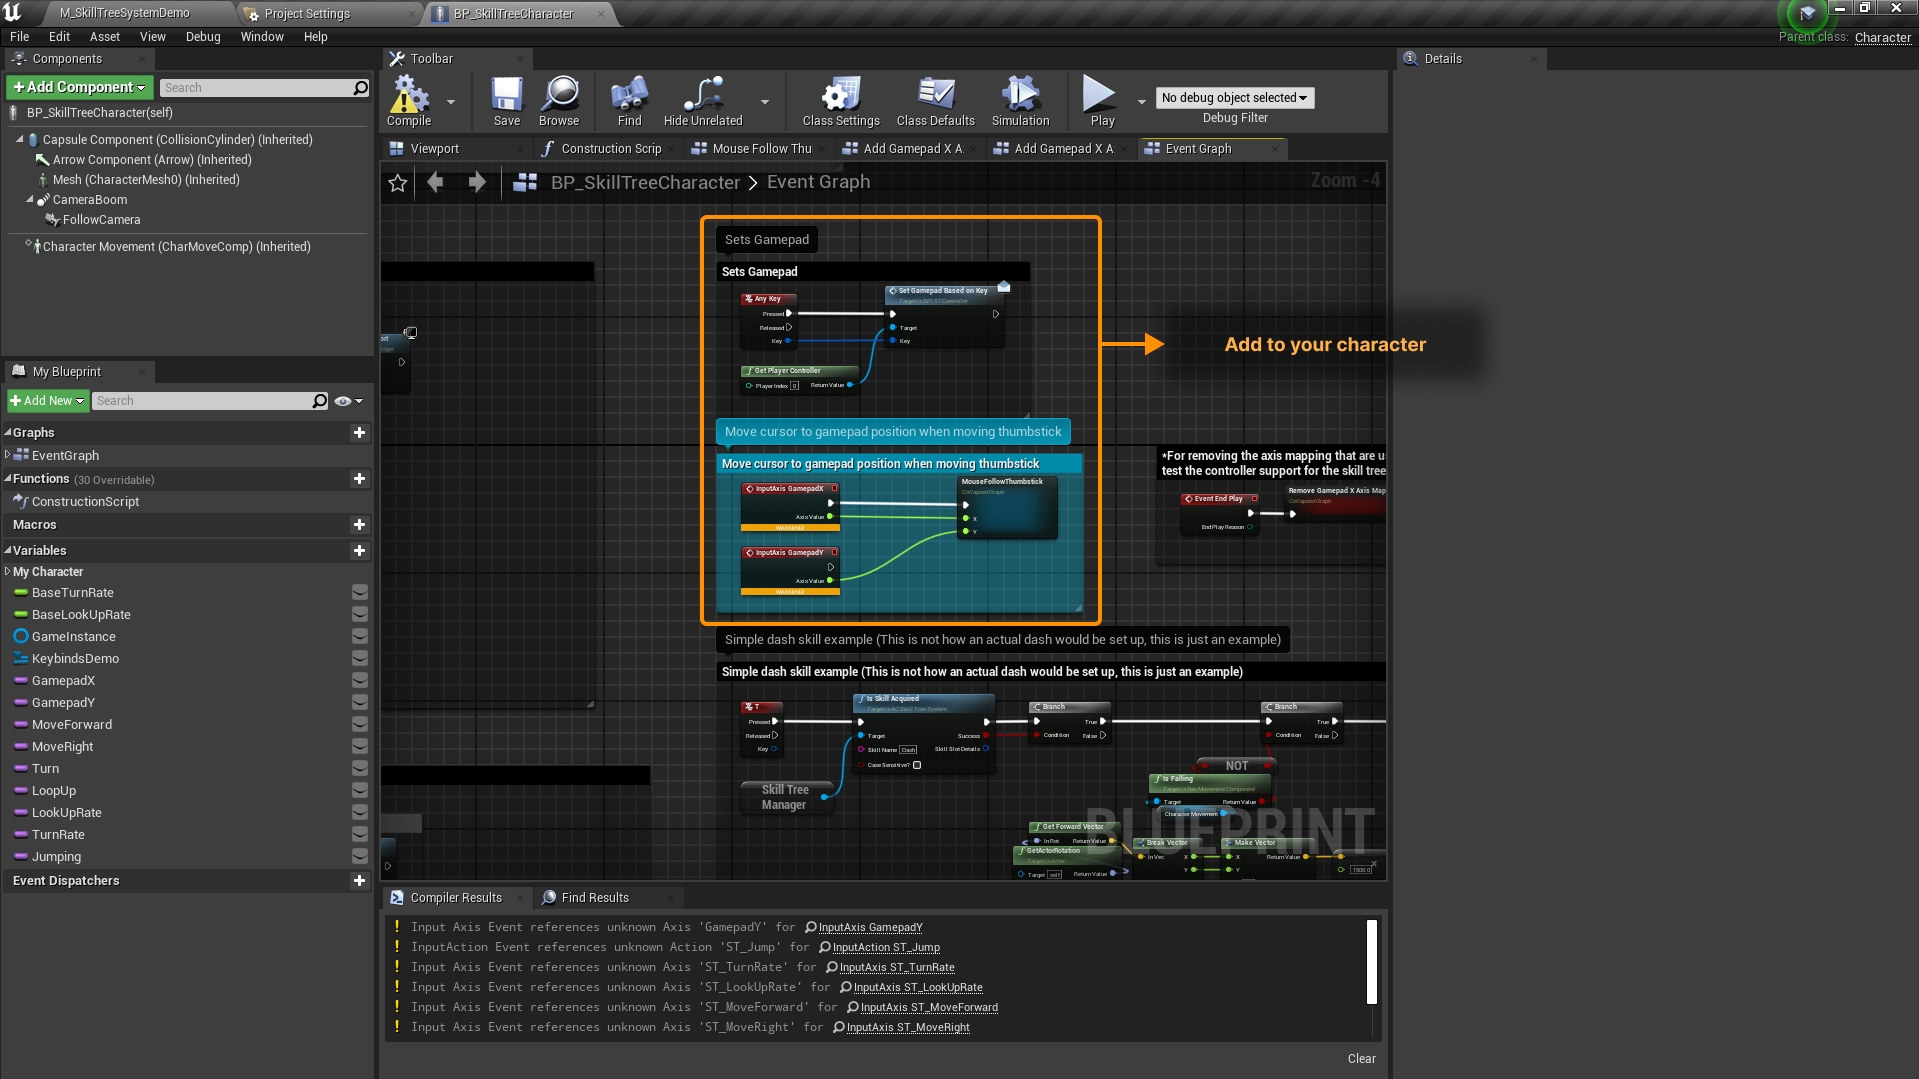
Open BP_SkillTreeCharacter copy these nodes to your existing player blueprint. This will allow the cursor to be moved with the controller. Compile your character blueprint that you have added this to, and if it still gives the yellow warning, make sure you are calling the input event that you set up in the previous step (Right click and search for the axis event you created, then connect it to the graph)
There are a few more things that will need to be done, these steps will be under "Controller Support Notes" in the "Customizing Skill Tree" section on the next page ->
Last updated