Creating a Skill Tree
Making Your Own Custom Skill Tree Layout
Navigate to
SkillTreeSystem/UI/Trees, duplicate theWB_SkillTreeMain, and rename it to your desired name.
Open your newly created skill tree widget and add a
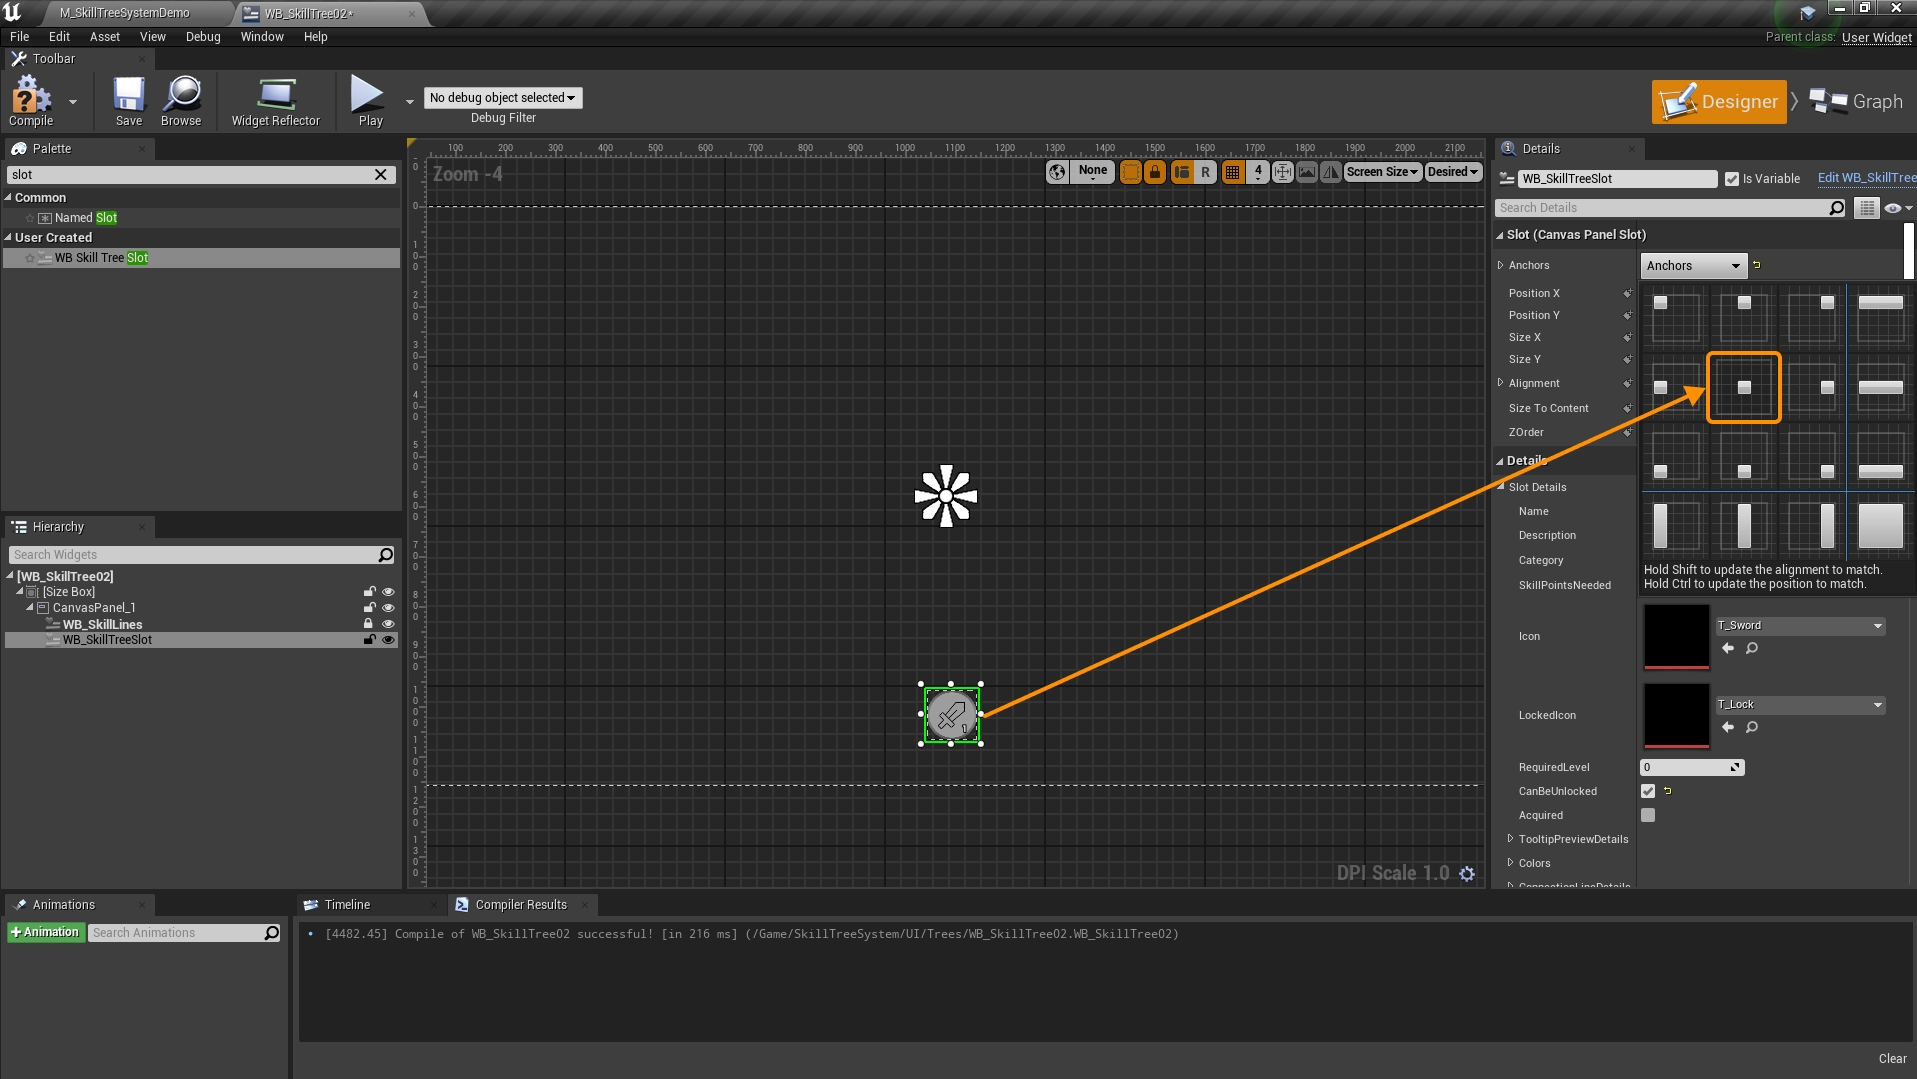
WB_SkillSlotto it. Ensure that it's anchored to the center (you can adjust this later, but remember you'll need to update the Line Offset value as well). If you don't plan on resizing the nodes, you can set Size to Content totrue.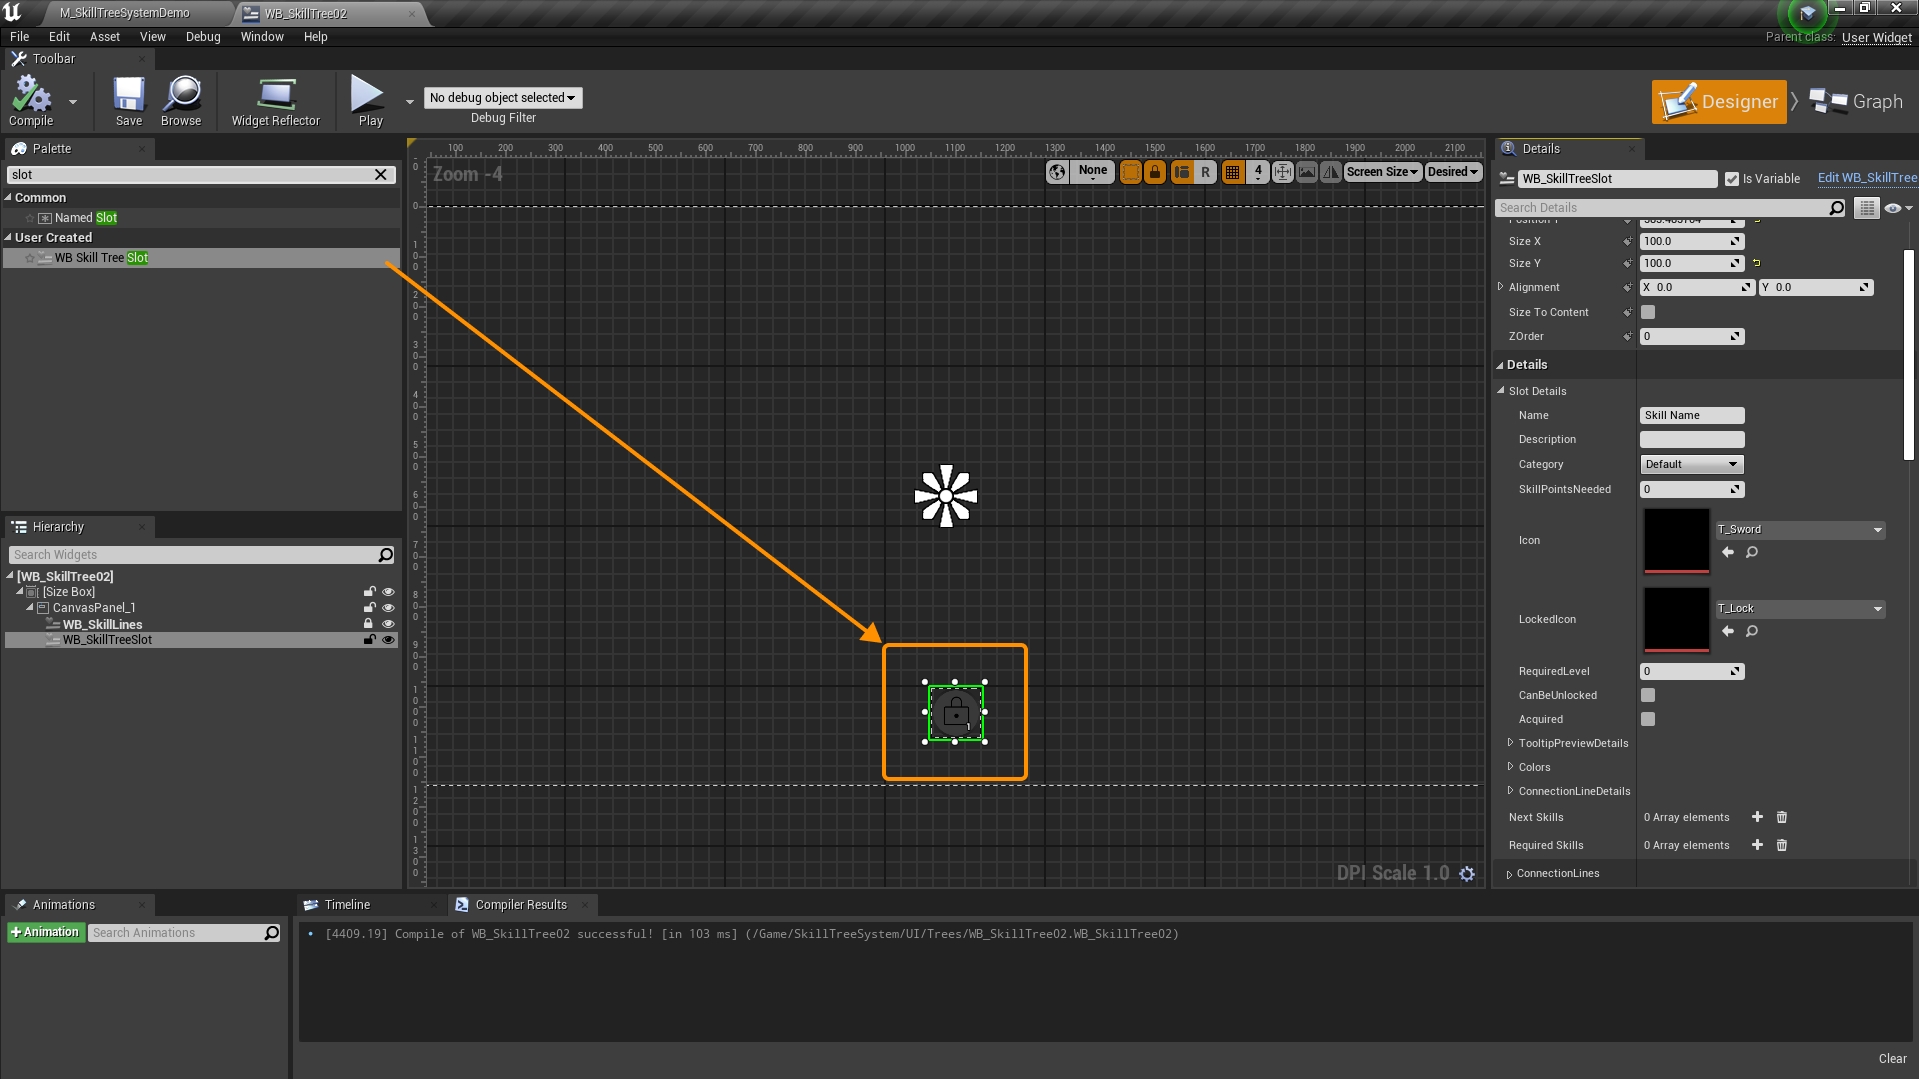
For the first skill slot, which will be the starting point, set Can Be Unlocked to
true. This will allow you to unlock the subsequent skills.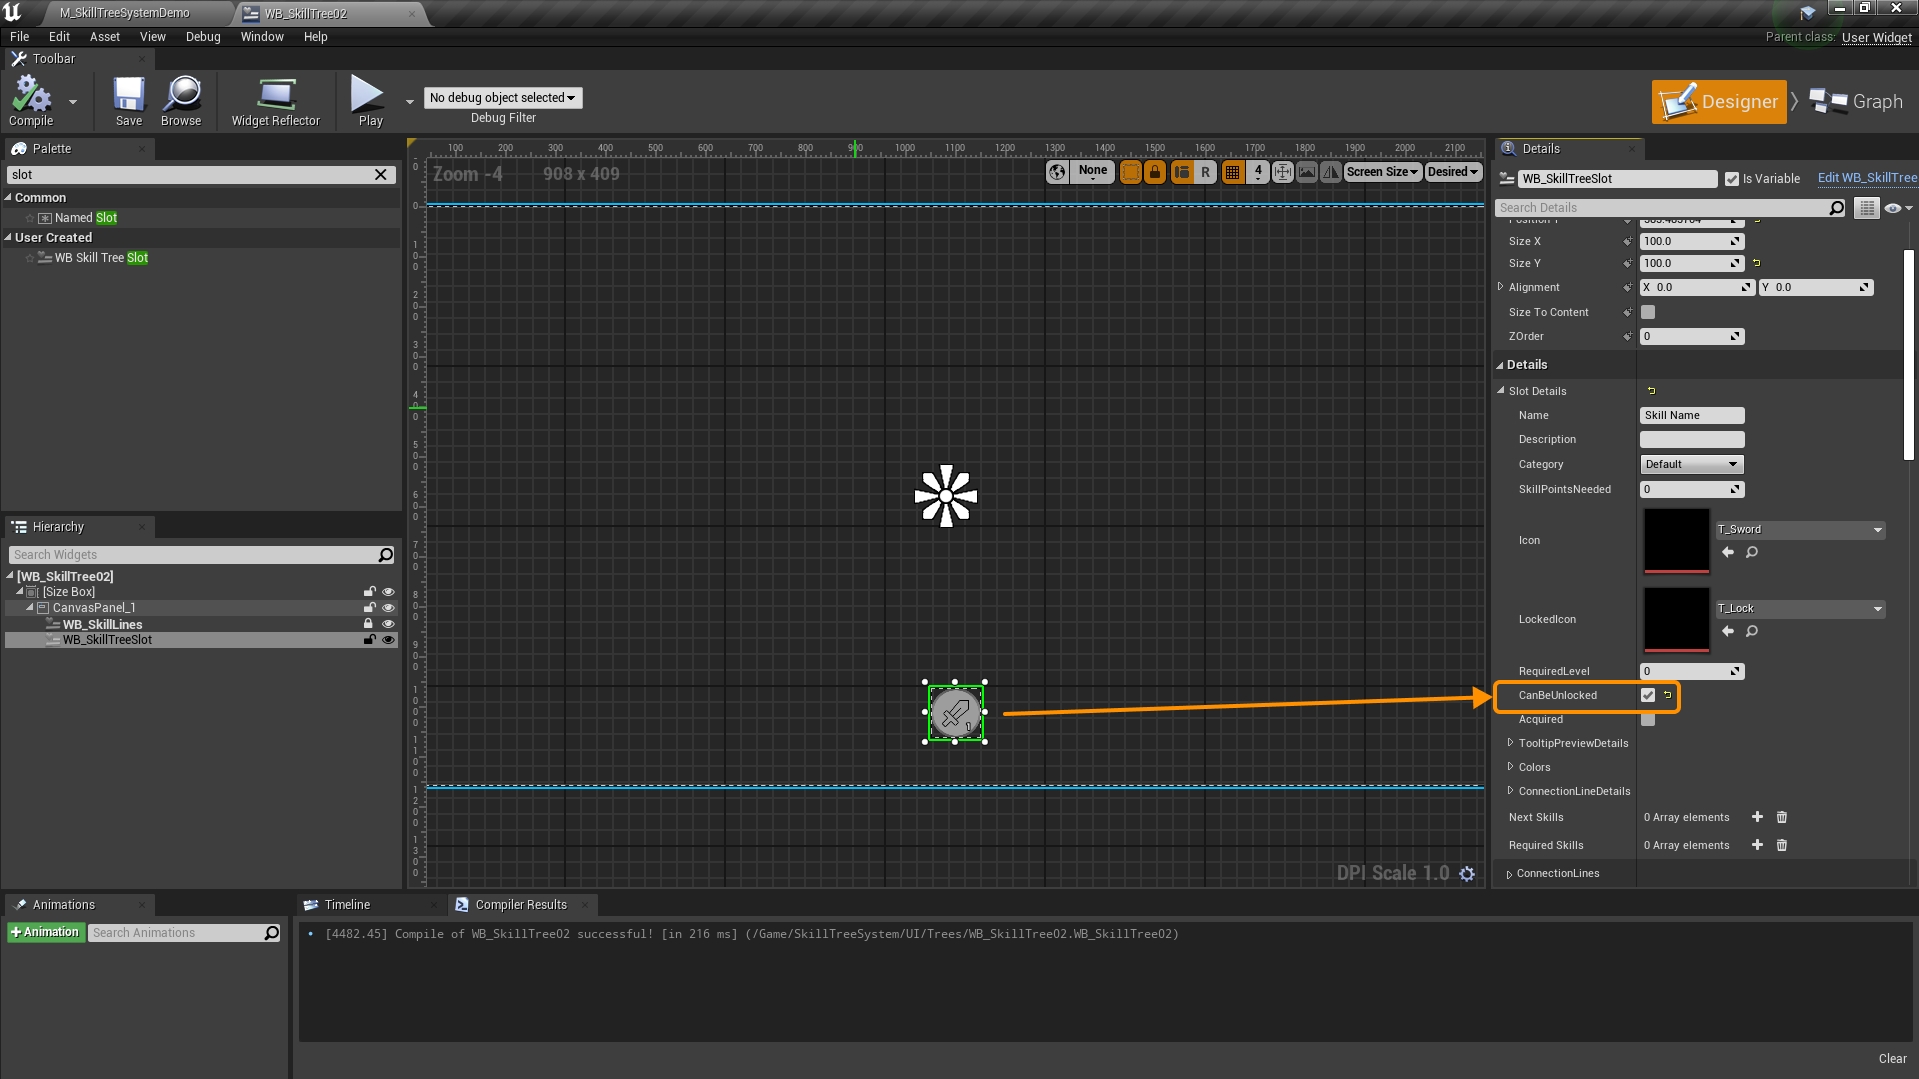
Its recommended to set the anchor to center, else we will have to modify the "Line Offset" as we will see in one of the following steps.
Add the rest of your slots to the layout you desire and make sure the "Can Be Unlocked" is false if you want them to be locked:

To add dynamic lines, select the skill you want to define as the unlocker for other skills. Add elements to the NextSkills array, in this case, I want to add 2 elements because I am connecting 2 skills.
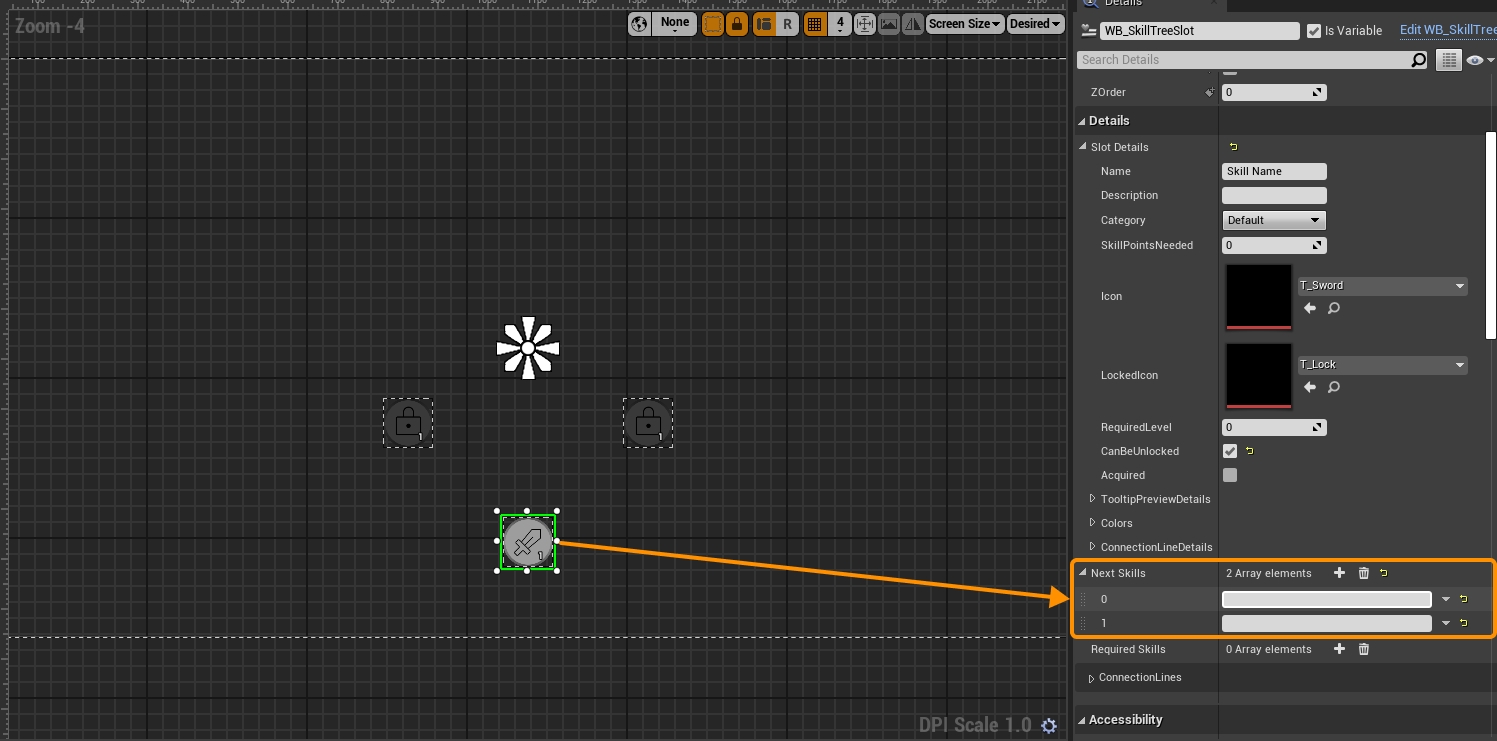
Select the skills you want to add to the previous skill's next skills array, copy the name the skill. Example:


Paste the name into the "Next Skills" of the slot that acts as the unlocker:

After compiling now, you should see lines connecting (Remember to compile if you want to see the visuals update):

If you adjusted the alignment and anchors, your lines might be offset to different locations:
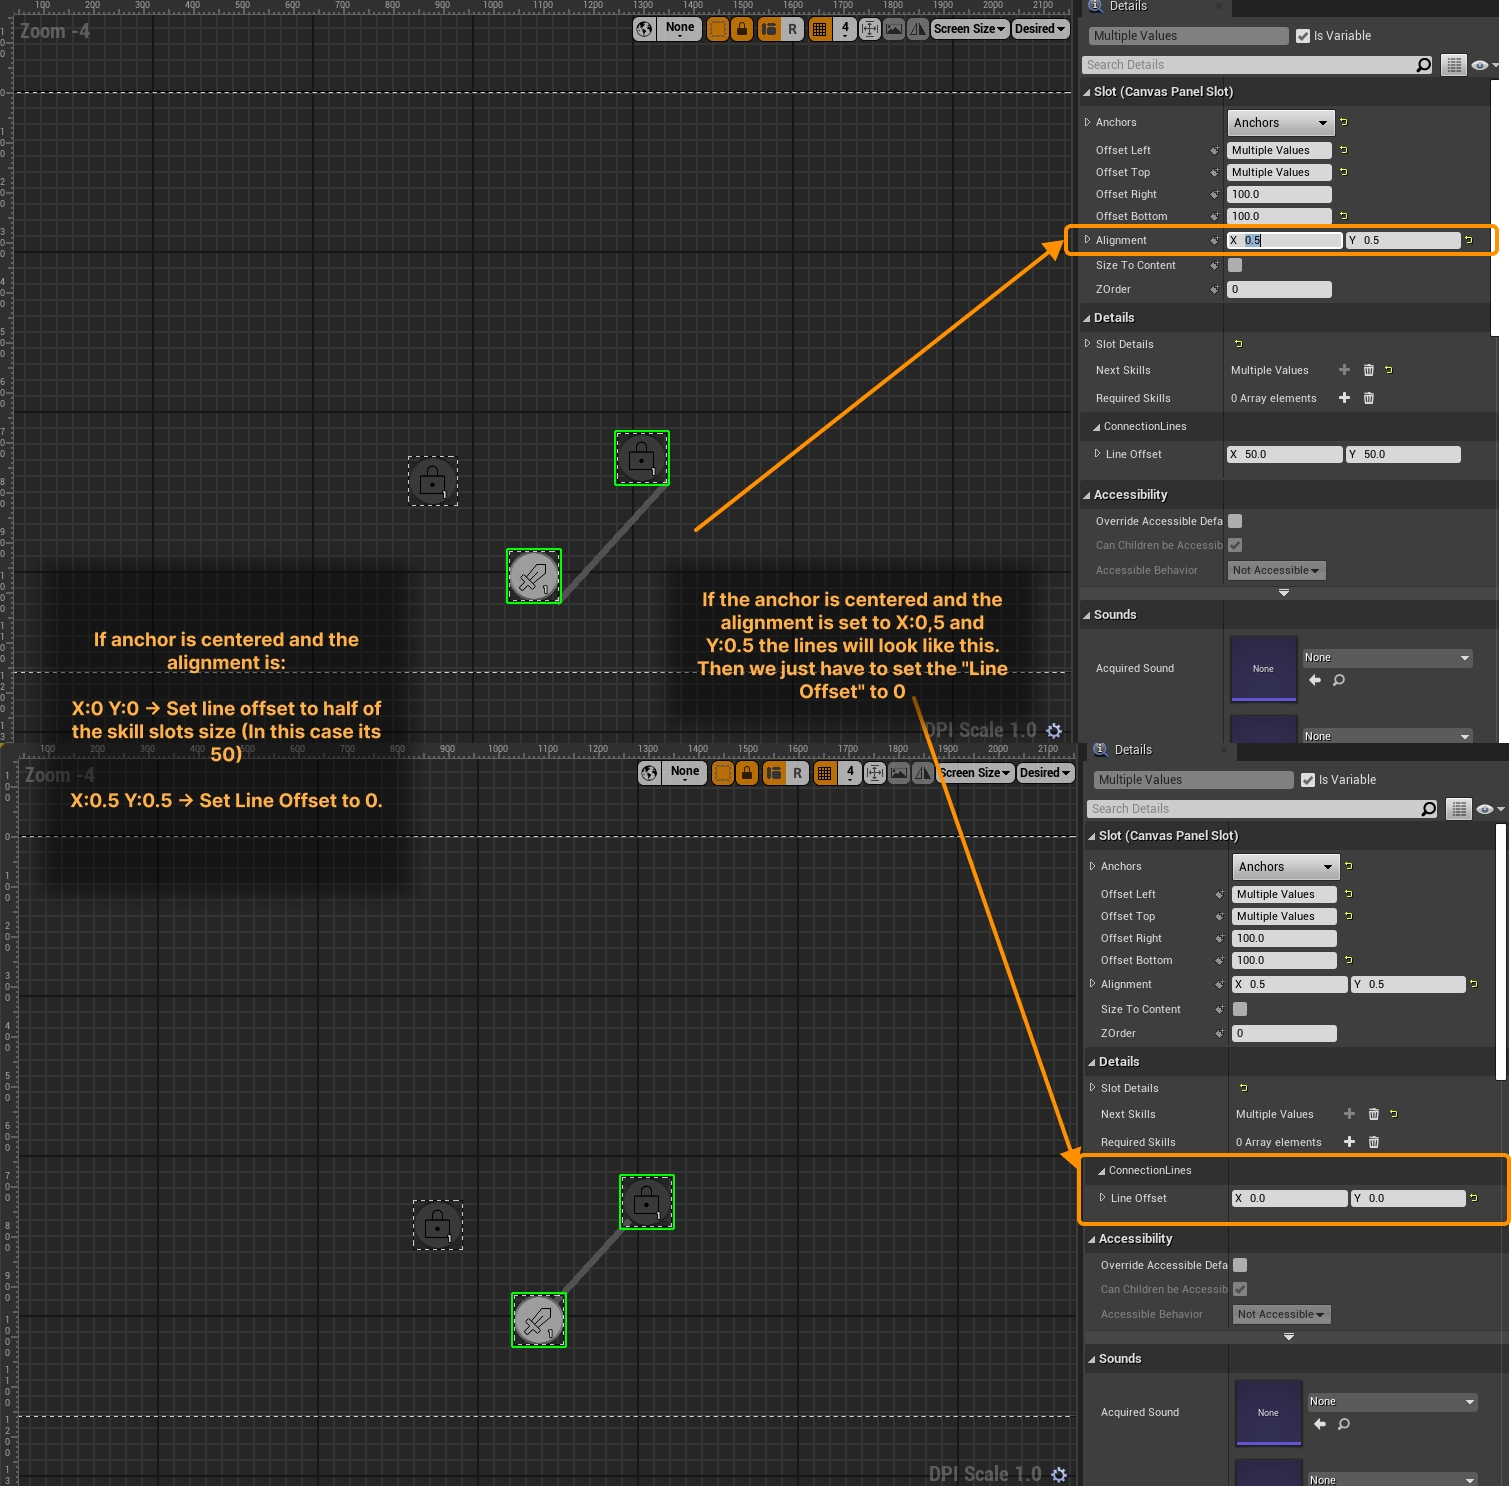
Recommendations: Set the anchor to center and apply the following logic If the alignment is: X:0 Y:0 -> Set the Line Offset to half of the Skill Tree Slot's Size (In this case its X:50 Y:50) X:0.5 Y:0.5 -> Set the Line Offset to 0 If you adjust the size of the node when your slot is anchored to the center and alignment is X:0 Y:0 then you need to remember to adjust the Line Offset to half of the size of the of the skill slot.
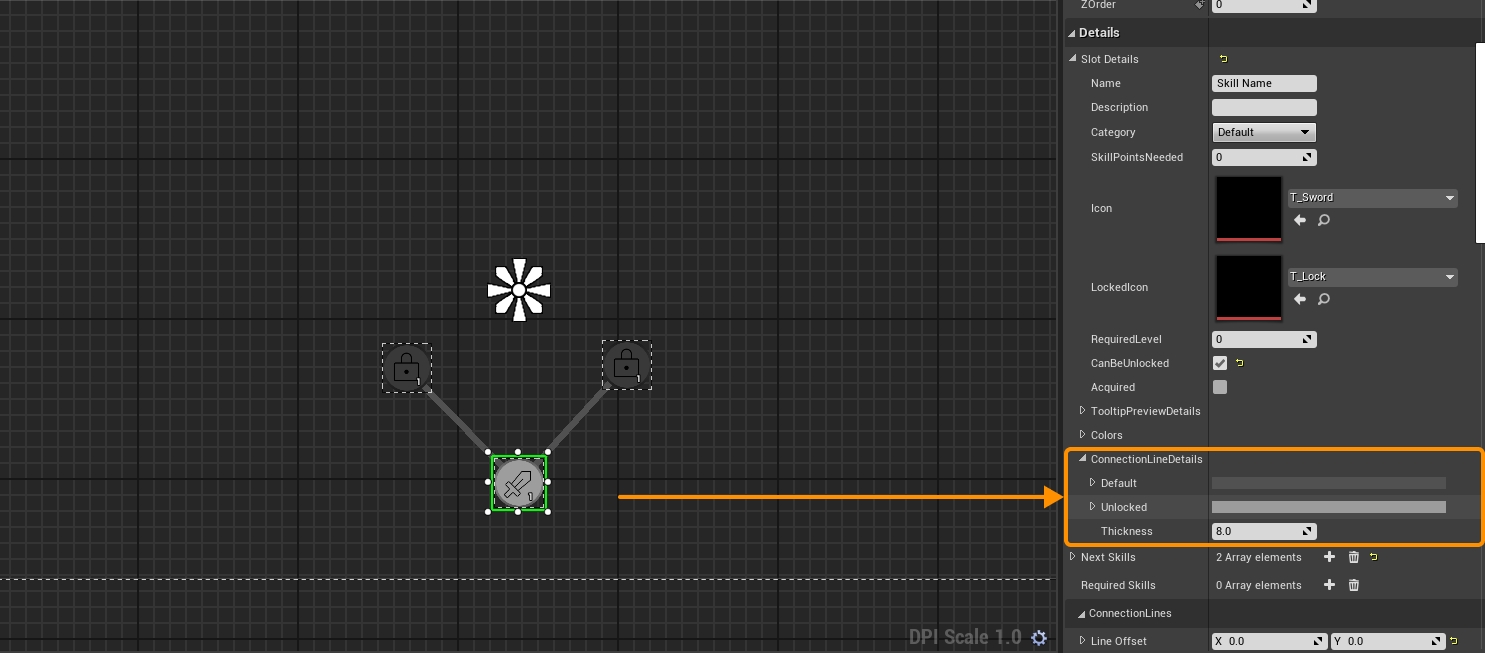
You can set the colors and thickness of the connection lines. If you want to set it for a singular slot, you can click on the slot -> Slot Details -> ConnectionLineDetails and set it to your desired look
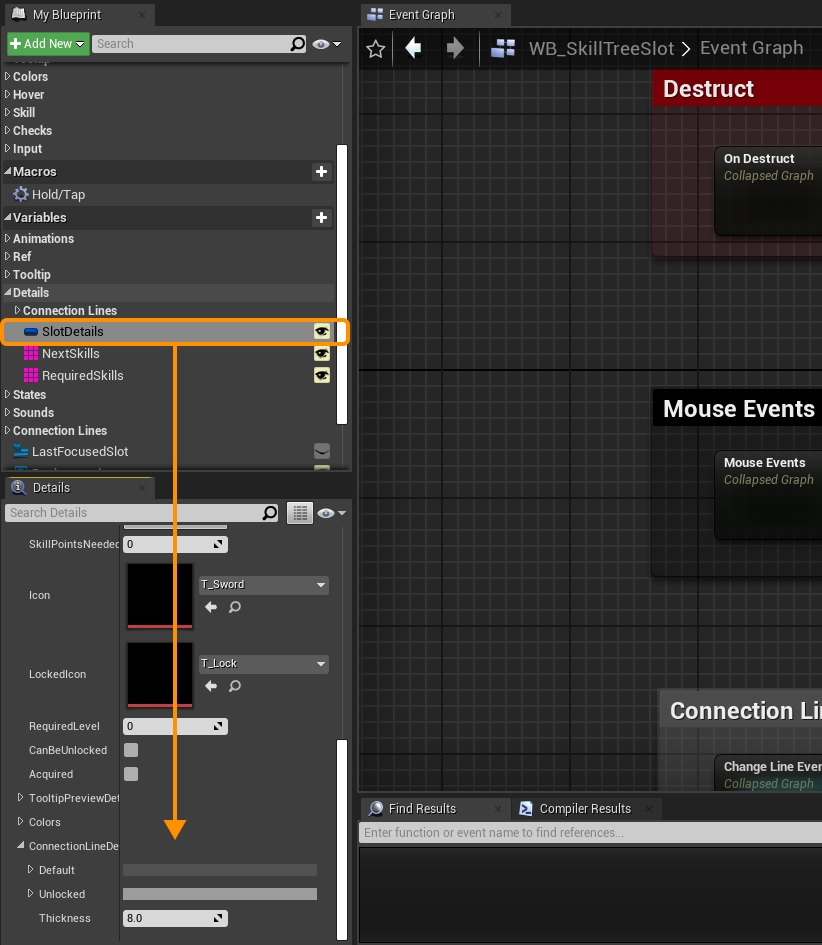
If you want to set the colors and thickness for all lines, open the WB_SkillTreeSlot and set the Slot Detail's -> Connection Line Details values:
Now you are ready to use your skill tree :)
Adding Your Skill Tree to The Current Template
*Optional: You can add the whole tree to your own custom made widget
Open the WB_SkillTreeWindow, remove the current skill tree, add your skill tree (make sure to put it inside the "PanningCanvas") and fit it in properly where you want to.
For testing, do exactly the same as step 4 inside “Basic Setup”
Adding Your Skill Tree to a Custom Template
If you have your own UI widget where you want to add the skill tree, you can just add the tree to that widget.
Adding Skill Slot Previews
To add an image preview is as simple as choosing your image under the slot detail’s “TooltipPreviewDetails”.
To add a video preview, there are a couple of more steps that need to be done.
Make a folder in the “Content” folder called “Movies”, and inside that folder create another folder called skills, add your skill video preview files to that folder.
If you don't already have a folder to store your videos, I suggest making a “Videos” folder where your main folders are. In this folder create another folder called “Skills” or “Skill Previews”
Right click -> Media -> Media Player
A popup prompt will appear, make sure to enable “Video output MediaTexture asset"
Open the Media Player, select your video (Skill) and make sure “Play on Open” and “Loop” are checked:
If your video has audio and you want to remove it you can just disable it in this option: Playback Options -> Audio -> Disabled
The next step is to create a media texture from the material from the media player: Right Click on Media Player -> Create Material
Open the created material, make sure the material domain is set to “User Interface:
After selecting User Interface as the domain, the nodes will get disconnected, make sure to connect the RGB to the Final Color:
All that's left is to add the preview to the skill. Open your skill tree, select the skill you want to add the preview to -> Expand the “Tooltip Preview Details” -> Add assets just created to the corresponding input:
You can edit the input prompts on the tooltip by opening WB_SkillTreeTooltip, click on the TooltipUIButtons variable, and change the icons. The recommended size to set them in the details are 25x25.

Test the preview in the game:


Controller Support Notes
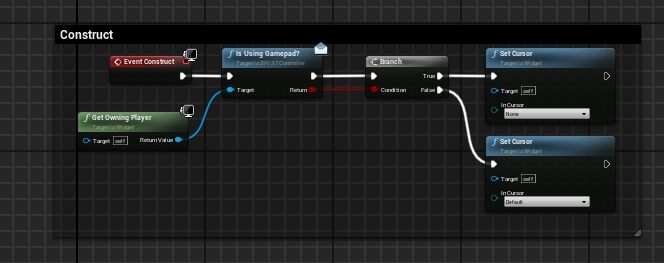
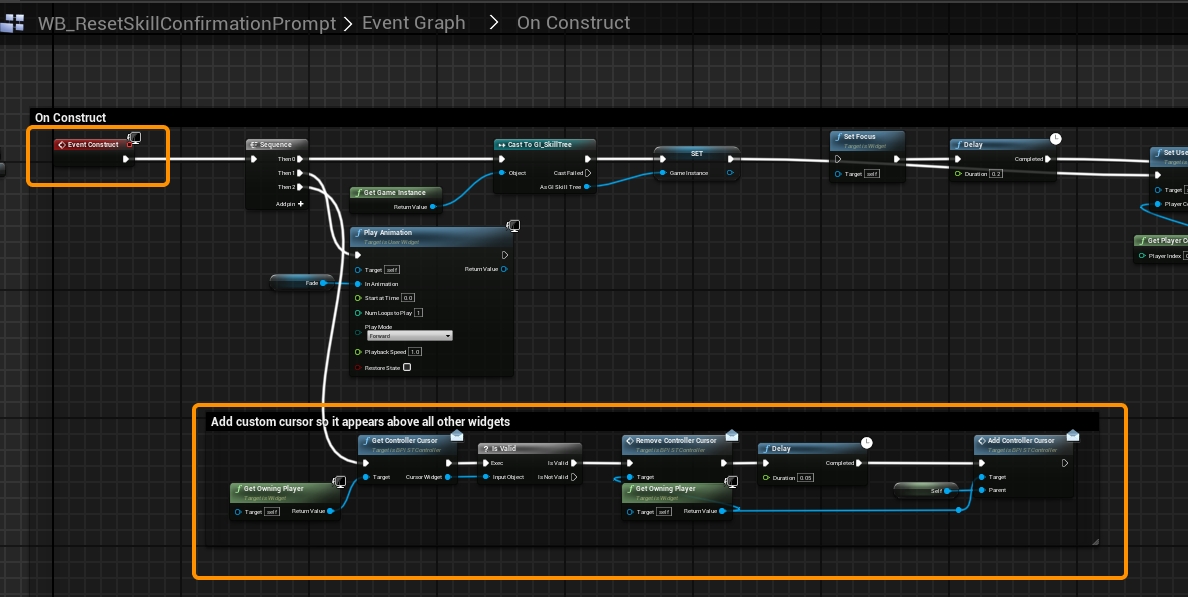
For your Skill Tree UI window (In my case I'm using the WB_SkillTreeWindow), I suggest adding these nodes to the construct:
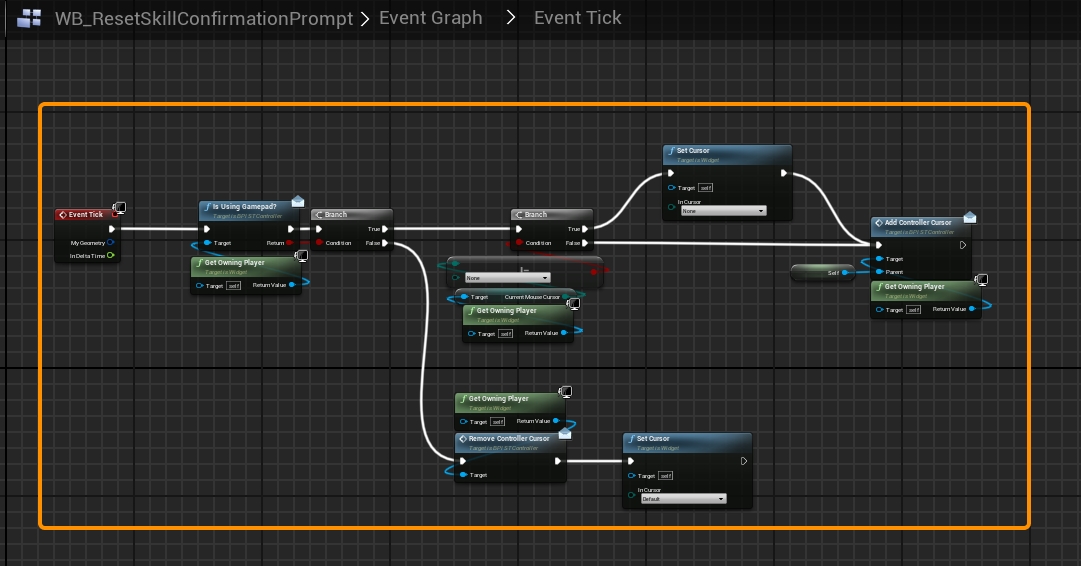
The following is in the event tick:
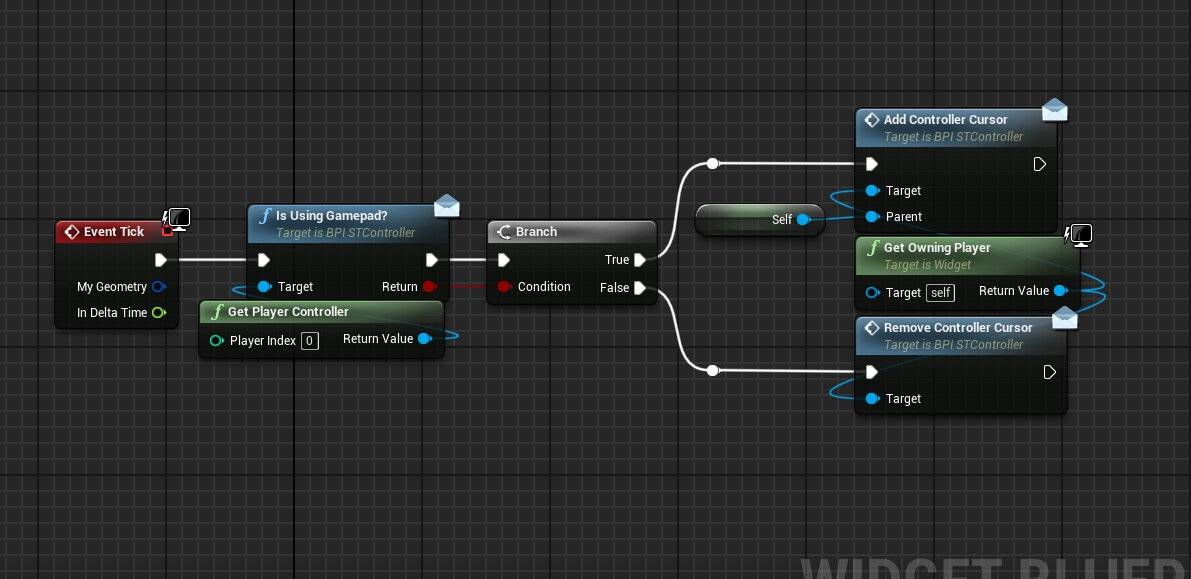
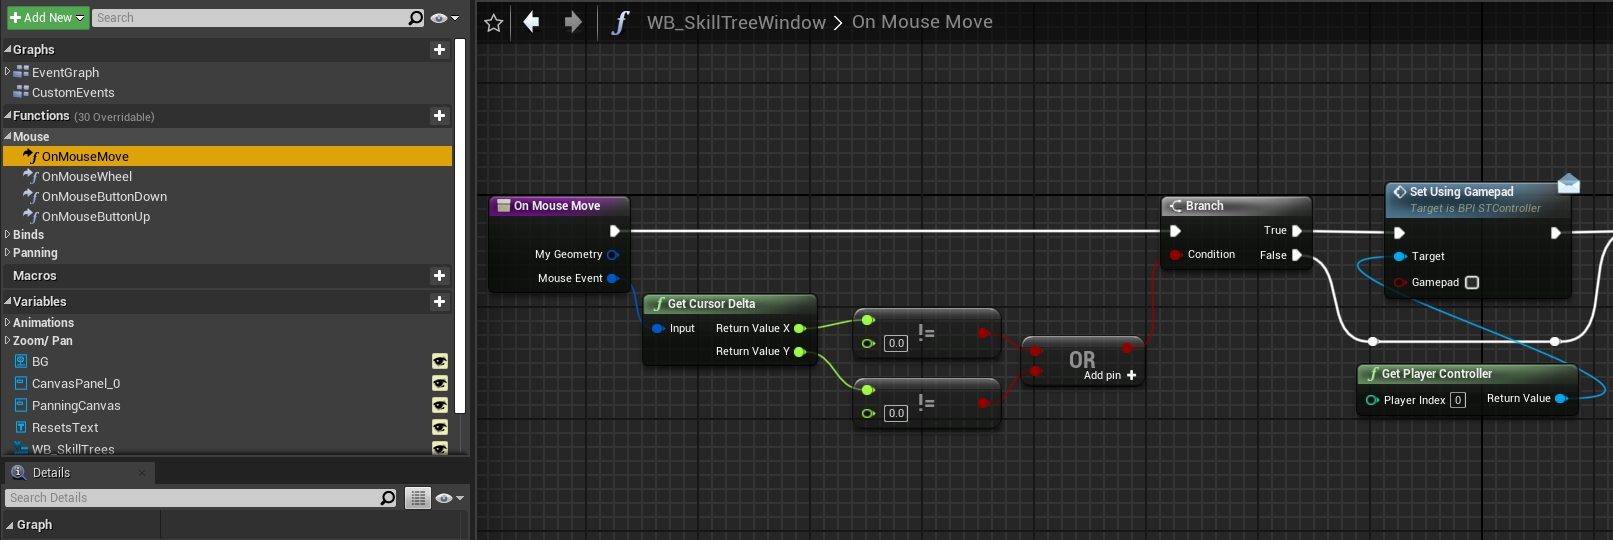
The following is in the "OnMouseMove" function:
For any new UI that you add on top of the main skill tree window, you will have to add the following code to those UI widget:
Last updated